|
|
Post by CISsuperdroid on Oct 16, 2016 18:28:06 GMT -5
Hello everyone, I'm the definition of an amateur customizer, and I don't plan to do many more custom Zoids in the future, but nevertheless, I had an extreme urge to ascend my poor junk Molga into something new. So here it is; the Sniper Molga! Equipped with a high-power sniper rifle, the idea is that the Molga is a cost-effective unit capable of being outfitted with a high-recoil weapon to counteract the Republic's pesky Gun Snipers/Snipe Masters. The caterpillar's low profile not only makes it harder to hit from range, but is ideal for shock absorption from recoil. With a darker color scheme, night ops and thick cover make it easily concealable (again, due to the low profile). With the cockpit being removed (or in my case, not having one), the head can now be occupied by a high-powered photoreceptor capable of infrared vision. The advanced targeting computer is also located in the armored head, thus relegating the pilot's seat to the tail (I didn't have any SAM's in the back, so why not?), which is an unlikely place to be fired upon should the Molga be discovered. The Molga's tail antennae have been replaced by a radar dish capable of receiving long-range radio transmissions, should the Zoid be deployed at long distances from its target(s) and for extended periods of time. Removed the old pictures of the unsealed coloring; final, updated pictures are what follows: 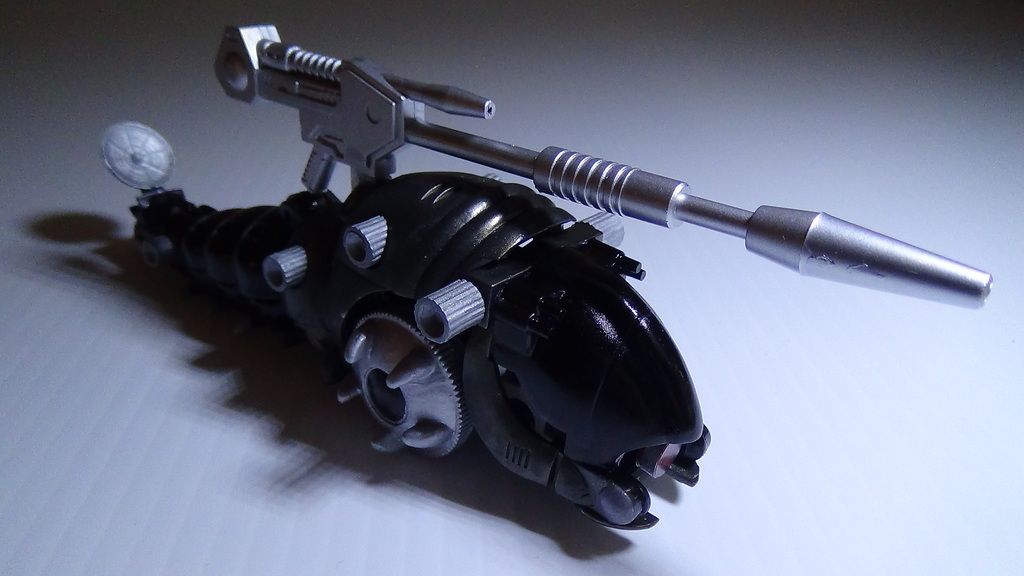 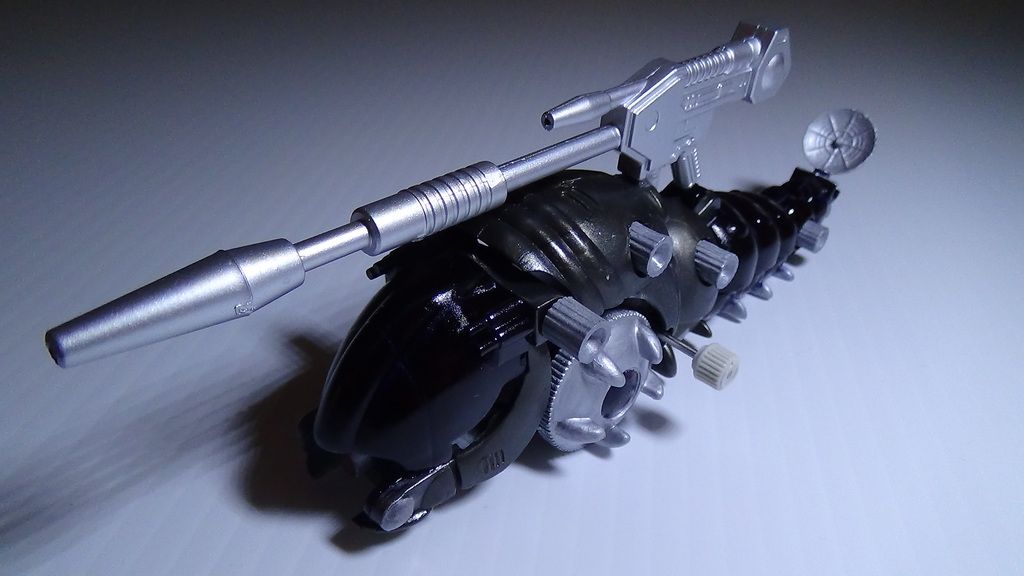 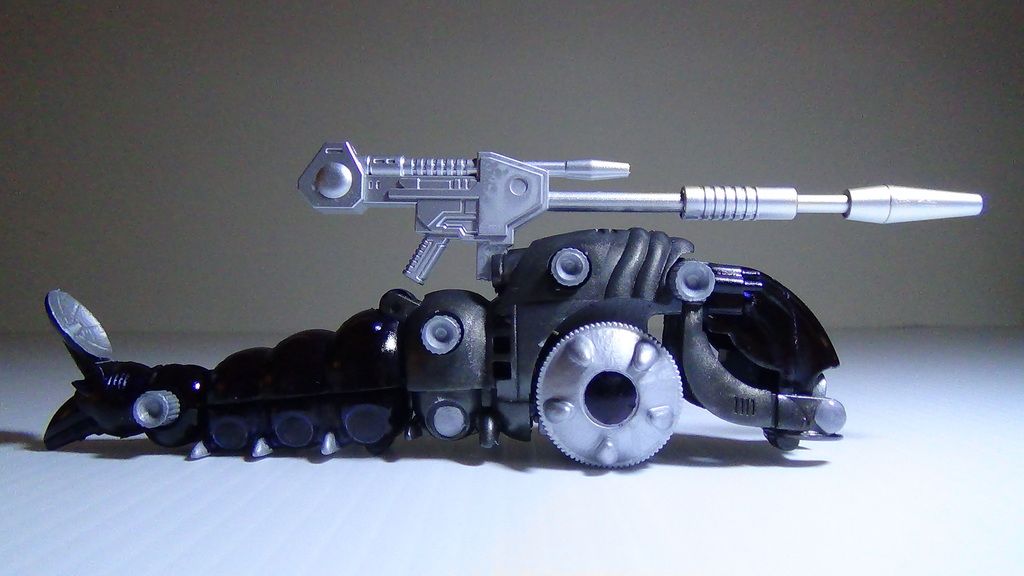 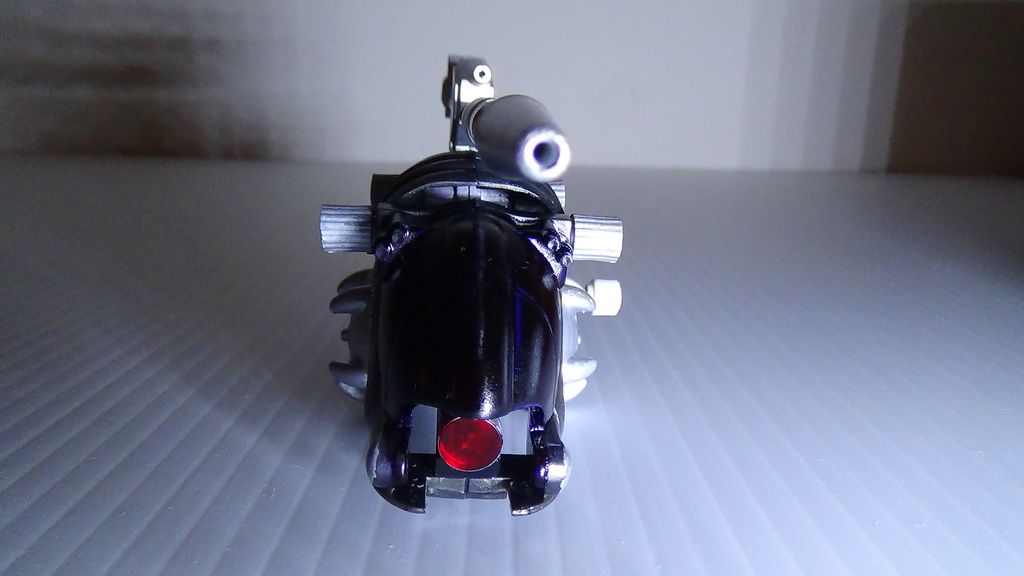 Photoreceptor withdrawn: 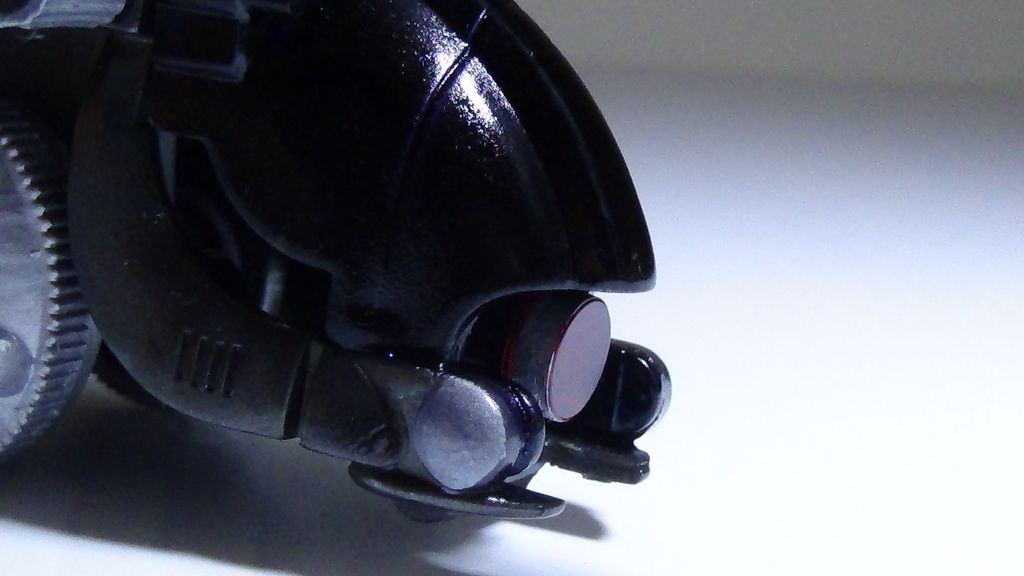 Photoreceptor acquiring target: 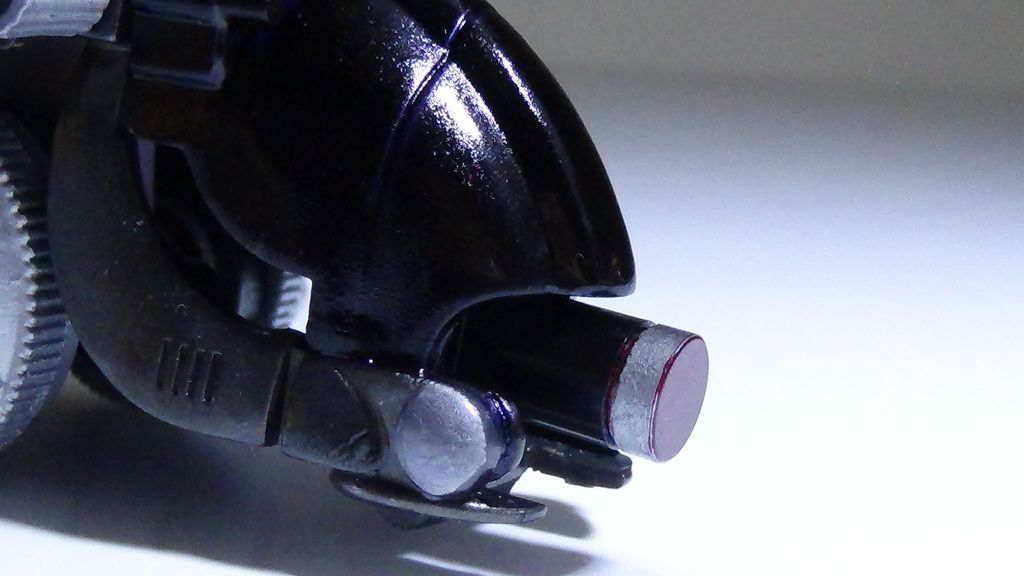 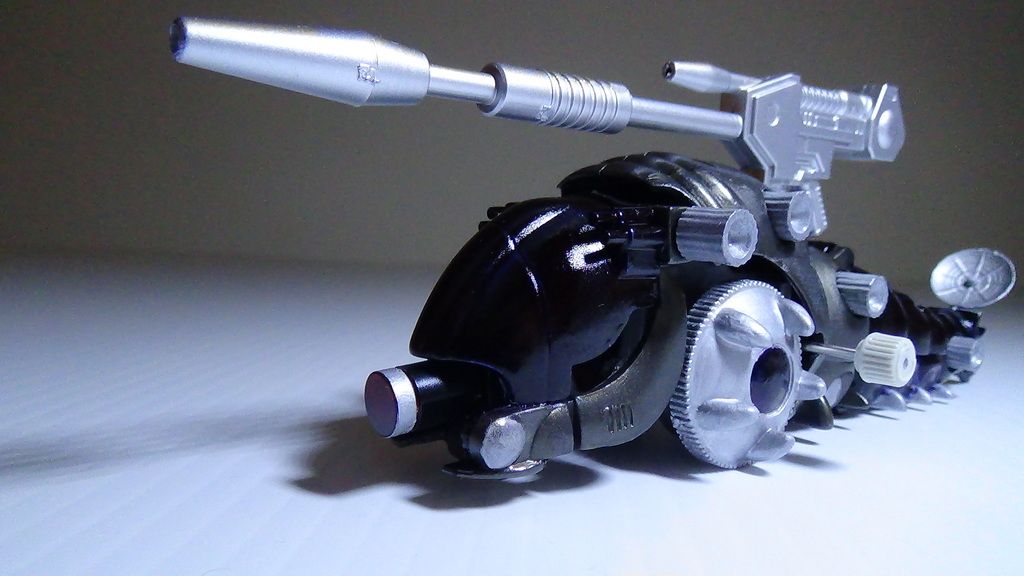 Cockpit: 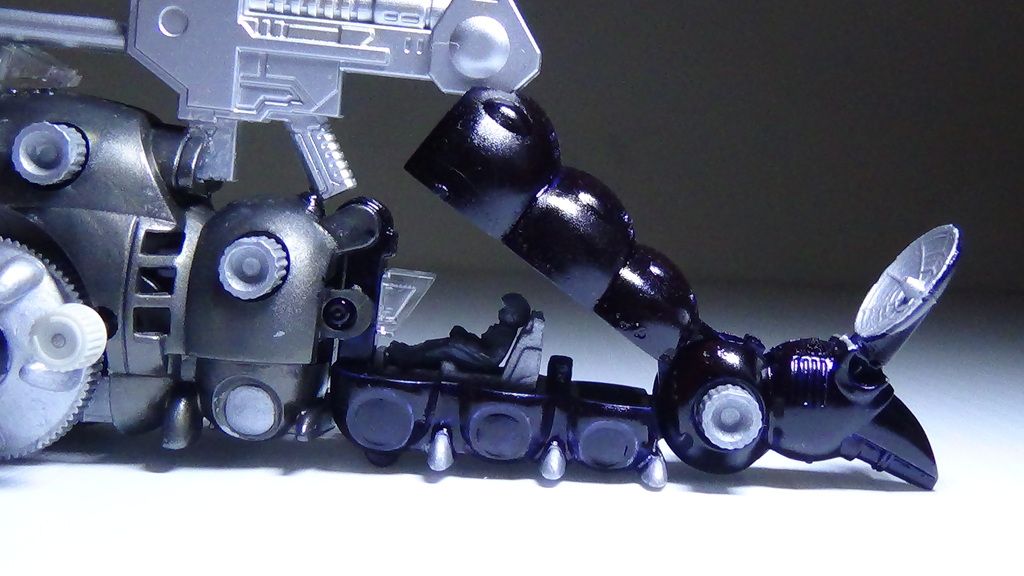 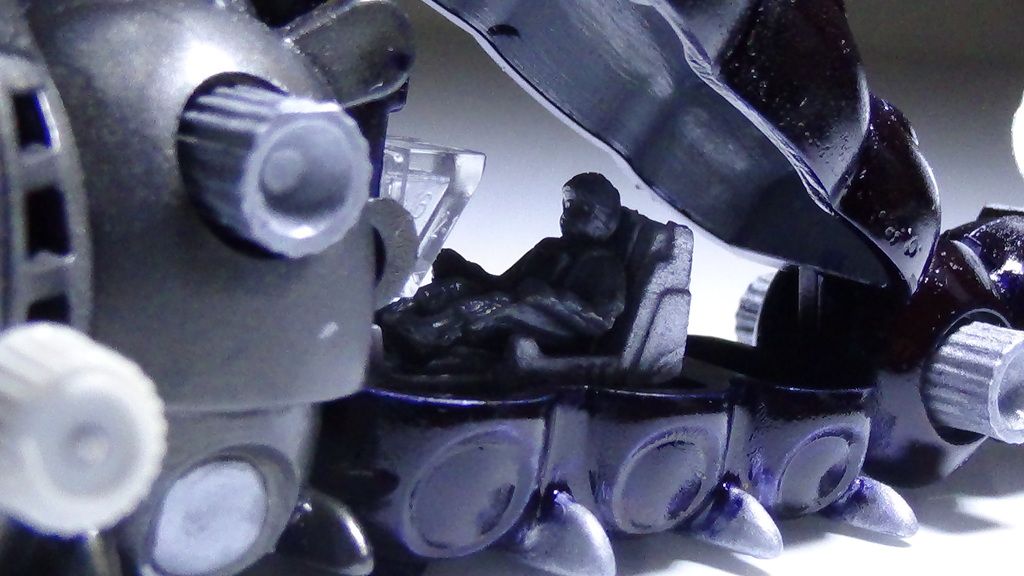 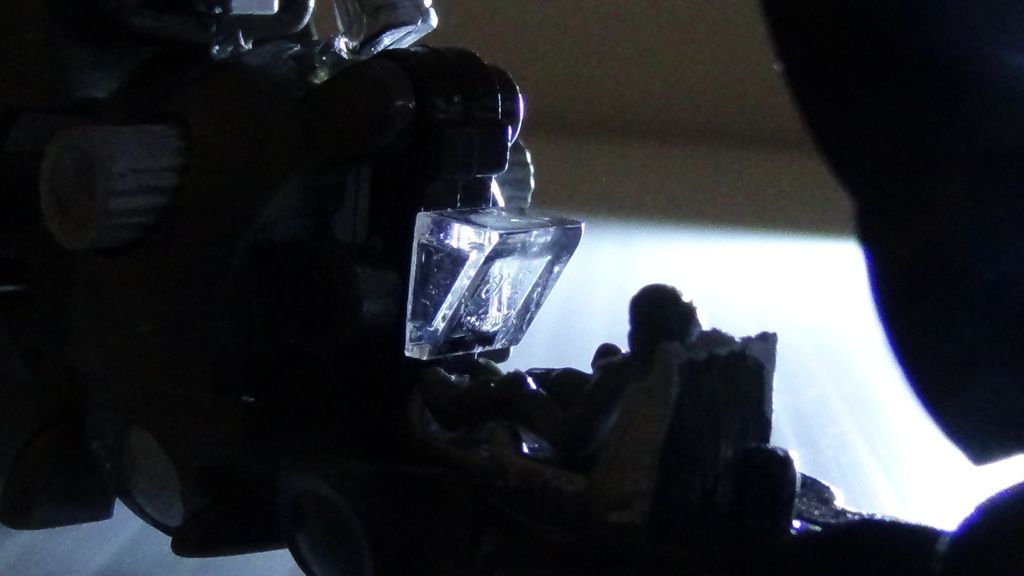 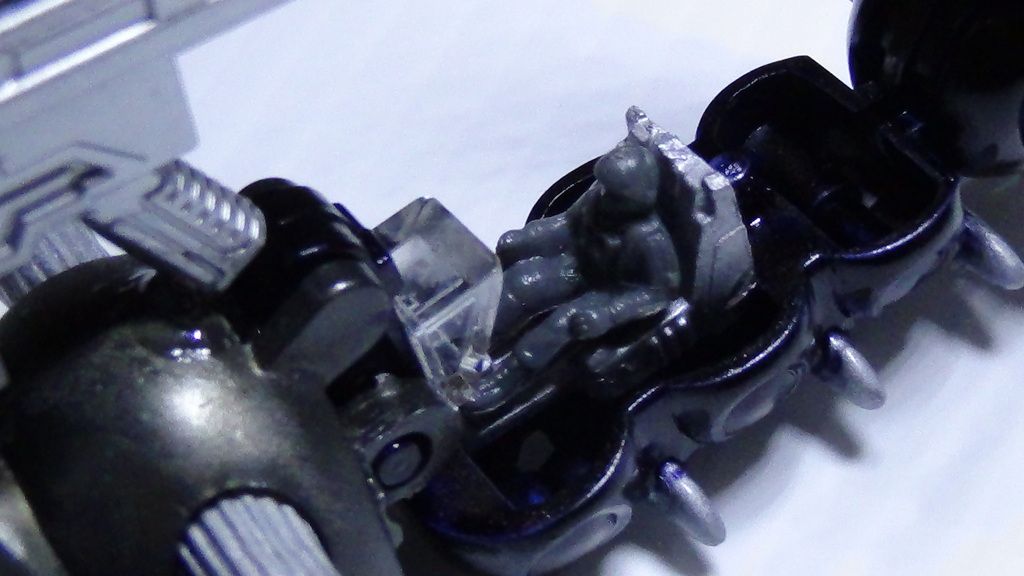 Long-range radar: 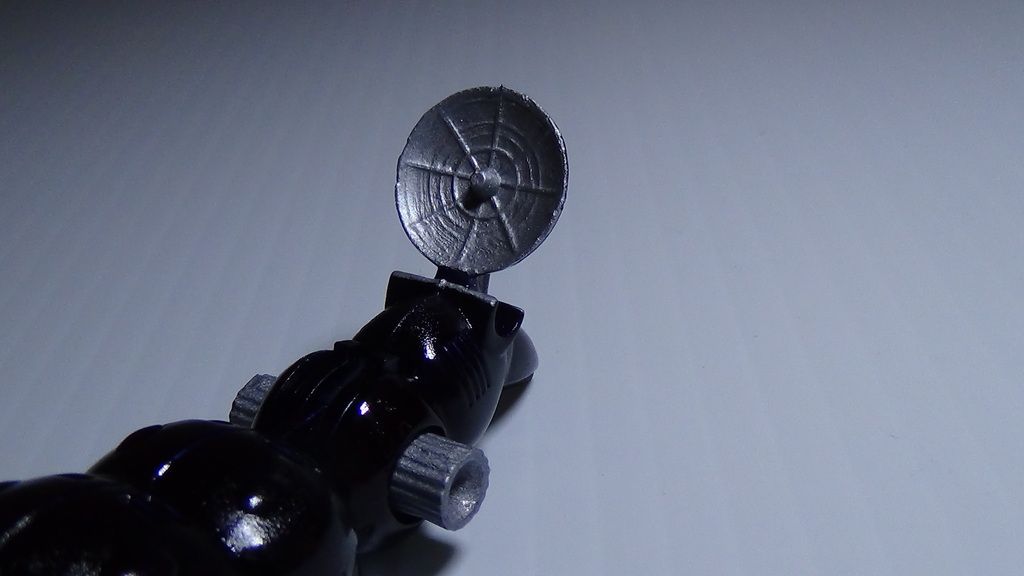 Belly: 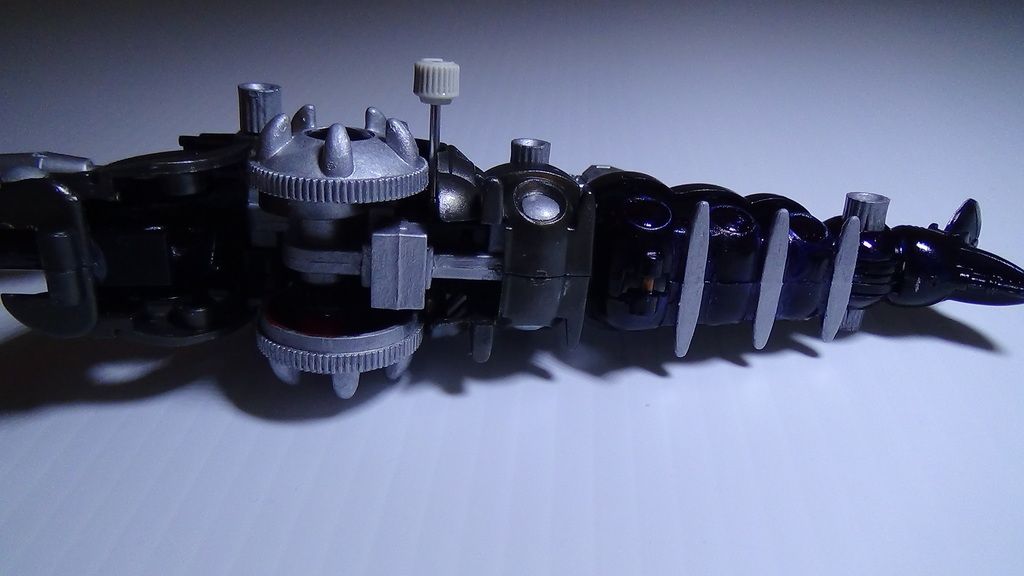 (You can see I cheated and didn't paint the insides of the wheels...) For the old pictures (unsealed), visit my photobucket and find the album called, "Sniper Molga V1": s349.photobucket.com/user/CISsuperdroid/library/?sort=3&page=1-------------------------------------------------------------------------------------------------------------------------------------------------------------------------------------------------------------- When I said I was an amateur, I wasn't kidding. Apparently, when my sister moved out to Texas, she took all of our paint with her, so I had no resources left to color this Molga- or so I thought. I had but a simple tool remaining- Office Depot permanent marker applied in 6 or more layers. The silver caps/wheels/internal structure? Sharpie Paint pen! Topped off with multiple coats of Krylon Crystal Clear sealer, I've realized what amazing things can be done with these basic tools. The photoreceptor was made out of four Lego pieces in black, with the "eye" being a transparent red stud with a flat top I had laying around from another custom project. I painted its rim silver for some contrast, like a lens of sorts. I already knew from the start that I wanted an adjustable "eye," so I made it to slide in and out, as well as to pivot from side to side. The radar dish was stolen from an Evil Scorpion and painted silver in the inside, then filed down at the base to fit in the antenna slot for gluing. Well, that's it! Just wanted to share my first custom Zoid with you all! Please let me know what you think! -Droid |
|
|
|
Post by Leon35 on Oct 16, 2016 21:23:46 GMT -5
This concept is flat out awesome! What did you use for the new headpiece, radar dish, and sniper rifle?nHow did you get the headpiece to extend like that?
I love that you put so much thought into the concept, and how you turned your poor Molga into something you can appeciate.
If you are worried about the sharpie coming off, go to a hobby store or order online. For $15-$20 you can order spray cans of primer and the colors you need.
|
|
|
|
Post by CISsuperdroid on Oct 16, 2016 21:45:54 GMT -5
This concept is flat out awesome! What did you use for the new headpiece, radar dish, and sniper rifle?nHow did you get the headpiece to extend like that? I love that you put so much thought into the concept, and how you turned your poor Molga into something you can appeciate. If you are worried about the sharpie coming off, go to a hobby store or order online. For $15-$20 you can order spray cans of primer and the colors you need. Haha, I'm glad you like it! Yeah, I was looking at some sealers like "Testors clearcote," "Krylon Crystal Clear," and a few other things so I wouldn't have to repaint everything. I actually put everything into the original post, where I said I used Legos (painted) for the headpiece(s), and a Guysack (or Godos) radar dish that I filed down. For the Legos, I simply made the attachment of the camera part a 1x1 stud on a 2x1 flat tile. The flat tile has no studs, and the bottom side is completely hollow, allowing parts to slide up and down freely, as opposed to regular, studded 2x1 tiles. The sniper rifle was an extra weapon I had in storage that came with a figure from a third party company called Keith's Fantasy Club (KFC, like the chicken). It was called "Mugan Scope," a re-imagining of one of my favorite Transformers. It came in a two-pack with another "Mugan" variation, and both of them had sniper rifles, so I saved one for later use, this being the Molga. |
|
|
|
Post by Snowflake on Oct 17, 2016 13:52:54 GMT -5
I love it! I love the colors, I love that someone besides me has done zoids in markers... and I love that you also thought to plug the gun into that little port on the back of molga's thorax, I always knew that thing would be perfect for something along those lines. The rifle really suits it. My only thought is that being so low, it would only be suited for extremely flat terrain, since it can't really peek up or down, and even the slightest brush would obscure its view. Maybe if that upper structure on the gun could be said to be a secondary camera. Also I love the idea of the pilot being moved to the tail, even if that means he'll be shaking around like a rat in a dog's mouth as he moves around, that could go for a lot of zoids really
|
|
|
|
Post by CISsuperdroid on Oct 17, 2016 15:53:05 GMT -5
I love it! I love the colors, I love that someone besides me has done zoids in markers... and I love that you also thought to plug the gun into that little port on the back of molga's thorax, I always knew that thing would be perfect for something along those lines. The rifle really suits it. My only thought is that being so low, it would only be suited for extremely flat terrain, since it can't really peek up or down, and even the slightest brush would obscure its view. Maybe if that upper structure on the gun could be said to be a secondary camera. Also I love the idea of the pilot being moved to the tail, even if that means he'll be shaking around like a rat in a dog's mouth as he moves around, that could go for a lot of zoids really Yeah, the port/booster seemed an ideal place for it; glad you like it! I was trying to use some Bionicle pistons (hard to find) to make a poseable rig for the sniper, allowing it to elevate as with the Canory Unit, but it just didn't work out, as there was no convenient place to attach said pistons in a way that they could be articulated. And I just noticed the low profile issue, as well. *sigh*, I guess it's just a prototype, then. Maybe I could add some gripping claws or something so it can suspend itself 1/2 off of a cliff for sniping, although that would make it an easy target. There is, however, a scope on the sniper, so I could just make that into an additional camera like you said, lol! When I moved the pilot to the tail, I intended it to work like in the anime, where the Molgas don't inch as much as they simply roll forward, so rattling/nausea wouldn't really be a problem. Thank you for the suggestions! |
|
|
|
Post by CISsuperdroid on Oct 19, 2016 18:16:59 GMT -5
I just bought some Krylon "Crystal Clear" sealer- in a couple of days, I'll go outside and spray on some coats to the Molga- hopefully, its resistance to liquids and smudging pays off, and I'll be able to actually TOUCH the thing!
|
|
|
|
Post by Maethius on Oct 20, 2016 1:23:38 GMT -5
I always felt that Molga would be a good sniper platform! I love the red lense; it makes the custom really distinctive. The gun looks like it could handle the job, too!
|
|
|
|
Post by CISsuperdroid on Oct 20, 2016 20:29:52 GMT -5
I always felt that Molga would be a good sniper platform! I love the red lense; it makes the custom really distinctive. The gun looks like it could handle the job, too! Yay, thank you! I always knew the rifle'd be useful someday. In other news, the sealer application was a near-disaster. I sprayed too close to the Molga (wanted to get in the cracks), which caused the marker to bleed off onto the dark grey parts, and the silver paint to dissolve!!! The red of the original wheels started coming through, and I was extremely crestfallen. But I didn't let this get in the way; I did some MASSIVE touch-ups, fixing all the bled parts (couldn't remove some of the stains, sadly) and giving a second coat of silver to the necessary parts. I noticed that the original bronze color in the pictures above became a DEEP black upon sealer application. I mean, that's fine, as I originally wanted it to be black to begin with, but I'd already gotten used to the bronze... Anywho, I'll be finishing the touching-up tonight and will upload fresh pictures tomorrow for comparison to the unsealed prototype. Thanks everyone for your support! |
|
|
|
Post by aceoftherebellion on Oct 21, 2016 10:28:00 GMT -5
Ouch, I'm sorry to hear you had so much difficulty. That's a very easy beginner mistake to make with spray paint, so definitely don't feel too bad, I've made this mistake before too!
If you want some hobbyist advice (I've been doing the whole painting thing for a long, long time now) the solvents that keep paint liquid can and will interact with the solvent-based layers underneath. Many hobbyists will use a sealant with a different base than the underlying coat to keep that from happening, but obviously that requires a little more in-depth knowledge of the different types of paint.
Whatever sealant spray you got should still work, though- if you try the top-coat again, just remember less is always more with spray paint, hold the can a good distance away and go for multiple fine, light coats and let them dry completely before adding the next coat. Don't worry about getting into the cracks and corners, the spray-effect will take care of that for you. Best of luck!
|
|
|
|
Post by CISsuperdroid on Oct 21, 2016 10:40:15 GMT -5
Ouch, I'm sorry to hear you had so much difficulty. That's a very easy beginner mistake to make with spray paint, so definitely don't feel too bad, I've made this mistake before too! If you want some hobbyist advice (I've been doing the whole painting thing for a long, long time now) the solvents that keep paint liquid can and will interact with the solvent-based layers underneath. Many hobbyists will use a sealant with a different base than the underlying coat to keep that from happening, but obviously that requires a little more in-depth knowledge of the different types of paint. Whatever sealant spray you got should still work, though- if you try the top-coat again, just remember less is always more with spray paint, hold the can a good distance away and go for multiple fine, light coats and let them dry completely before adding the next coat. Don't worry about getting into the cracks and corners, the spray-effect will take care of that for you. Best of luck! Okay, thank you for the tips! Yeah, it's too late to go back and redo from the ground-up, but it's still salvageable. I re-touched a few silver parts, and had a lot of frustration with the wheels, but it's coming back together. "Less is more" is very true, I just didn't think of it because it was my first time using a product like that. I'm almost done re-sealing the remaining parts, but I'm scared of trying it on the silver again. I now know to keep it far from the spray itself, but I don't know if the Sharpie paint can withstand even a light amount of the sealer. The first coat (which smeared/melted it all) kind of acts as a primer now, so if I went over the new coat of silver, would it still smear? The layers are as follows, from top-down without final coat of sealer: -Sharpie Paint ~ Thick Coat of Sealer -Sharpie Paint ~Plastic So if I decided to seal a very thin layer of sealer on the topmost coat of paint, would it "work?" I mean, the paint is solid enough to not rub off, but I just want to be safe for the long run. |
|
|
|
Post by aceoftherebellion on Oct 21, 2016 11:27:09 GMT -5
As long as you spray very light coats and let it dry completely before applying another coat, it should work just fine. If you're worried, you can try a sealant that uses a non-solvent base, like a brush-on water-based acrylic top-coat (model paint brands Testors and Vallejo both use water-based paints that should not react with any solvent based undercoats)
Something I'd highly encourage you try is to create a test sample. Take something like a bit of sprue, paint or sharpie that, and then experiment with how thick/thin a top-coat you can apply with your spray without harming the underlying paint. That should tell you exactly what you can or can't do with your materials.
|
|
|
|
Post by CISsuperdroid on Oct 21, 2016 14:16:15 GMT -5
Alright, I'll give it a go with the test. Thanks for the tips! Almost done re-sealing the whole thing now- still have to touch-up some parts. Then I'll get pictures done later- working on college apps right now.
|
|
|
|
Post by CISsuperdroid on Oct 21, 2016 15:30:07 GMT -5
Okay, so test was unsuccessful. The Sharpie paint cannot withstand the sealer even in thin coats. Which is fine, as the paint doesn't rub off with touch unless you really go at it. This goes for most unsealed acrylic paints, as well, I suppose.
|
|
|
|
Post by CISsuperdroid on Oct 21, 2016 19:22:03 GMT -5
Looks like I'll be postponing the "finished" pictures to tomorrow. Sorry guys!
|
|
|
|
Post by Maethius on Oct 22, 2016 15:37:34 GMT -5
Can't wait to see them! I got to learn a lot of hard lessons about layering acrylics, enamels, and lacquers, too... especially with decals in the mi. Have to watch out for the order in which you do them, how thinly layers are applied, and how much drying time they require.
Good luck on finishing!
|
|


