Post by ROss on Dec 15, 2004 3:47:52 GMT -5
Ok kiddies, I know that some of you were wondering what the hell qualifies a 17 year old like me to critisise art ( well homany do you know that are doing a degree in architecture at a world renound art school???), and how i grade stuff, so i'd thought i'd integrete them both into a brief tutorial on how to draw.
Right first things first
THE TOOLS
obviously you require paper, now depending on what media you wish to use to do the peice determines what type of paper to use. cartidge paper is good for any thing other than paint or ink, and photocopy paper is even worse. in the following examples i have useed 60 g/m2 tranlucent paper (or i laymans terms medium dencity tracing paper- i need this for the couse i'm doing at uni, so i have a 92cmX1200cm roll of it= about £30 a roll) but you can get a good quality cartidge paper about 150g/m2 for around £3 for 30 A4 sheets, going up to £7 for 30 A2 sheets.
Media/ Medium this mean what it is done in i.e. pencil pen, ink, paint etc. I suggest that beginers stick ti pencil it is best to have a variety of pencils, the best would be a 3H, and HB and a 3B, ( if you don't knopw what the grades of pencils mean H= hard, B=black/soft, so an HB is the bog standard graphite used in most pencils, this means the lead is relativly hard ( less sharpening and quite dark do goos tonal depth) the number is the grade the higher the number the more that pencil leans to that side, so a 4H means the thing hardly goes blunt, but it is very light, but to the other extream a 4B is very dark but is also very soft meaning you have to sharpen it more) i would however suggest you get a pack of pencils with a variety of grades you can get these for like £4.50 but thy last a long time. I also use a mechanical pencil or propelling pencil, i use various thicknesses and grades of graphite in these also, these are good because they don't go blunt and have a constant thickness to them which is useful for detailing.
colours, couloured pencils are tricky, a good quality set of them can be any ware upto £200, yes two hundred pounds. but a pretty good set of 20 can be got for a lil under £5, but youi can use those 99p ones but they are pretty poor unless you know what you are doing.
Chalk pastles, oil pastels and paint are probably not the best for the subject i guess you will be using them for, so i'll skip them, but i'll come back to them if you really want. felt-tips are tricky to use but if you are reasonaly skilled you can get a nice effect. the same with ink, now i dont really use ink or paints so you'd best ask some one like GP23 bout that.
oh yeah get a good rubber preferably a putty rubber- it looks and feels like play dough but they are much better than the rubber rubbers, plus because of their consistancy you can shape them so you can get into very small ares, so you gan erase something with out disturbing the rest.
THE PROCESS
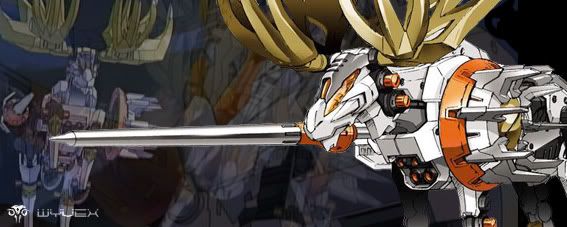
befor you start on a proper picture think of what you want to draw and what pose tou want it to be in. if you are making up a zoid look ate its presadents for inspiration. In this tutorial i'm gonna draw a picture of my custom Hydrer wich recently featured in my fake box.
step one- map out pose

THis is essential as with out this frame work things can and do go wrong very quickly. You may want to do this ona seperate sheet and place it under a clean sheet to do the prper picture on. in this care i'm using 3 sheets of tracing paper, to draw on. you could even use the back of the sheet . in this step try to suggest the pose and ground and get the propertions and perspective sorted. you may want to use the 3H for this if oyu are keeping the whole picture on one shhet
step two- block in body thickness
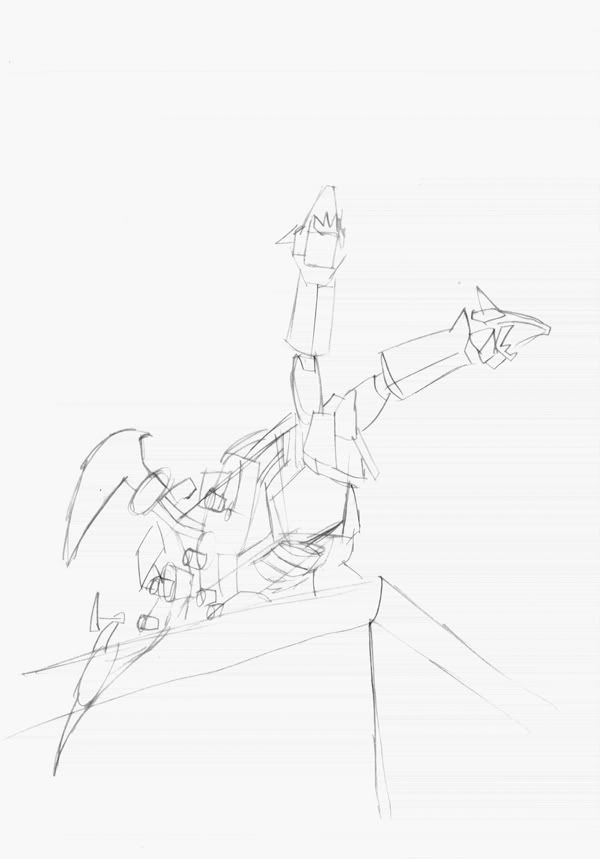
build up a series of shapes ontop of the basic frame making the shape develope into the final shape, in this stage try to suggest to your self were some detail is gonna go. again use the 3H for this
**tip, if say you are going to do a dog type zoid an idea would to get an image of a dog from the net then print it on and trace it onto the sheet or is toy are using t-paper put it under neath- i don't need to in this case as i have the zoid set up infront of me)
step three-add detail and rendering
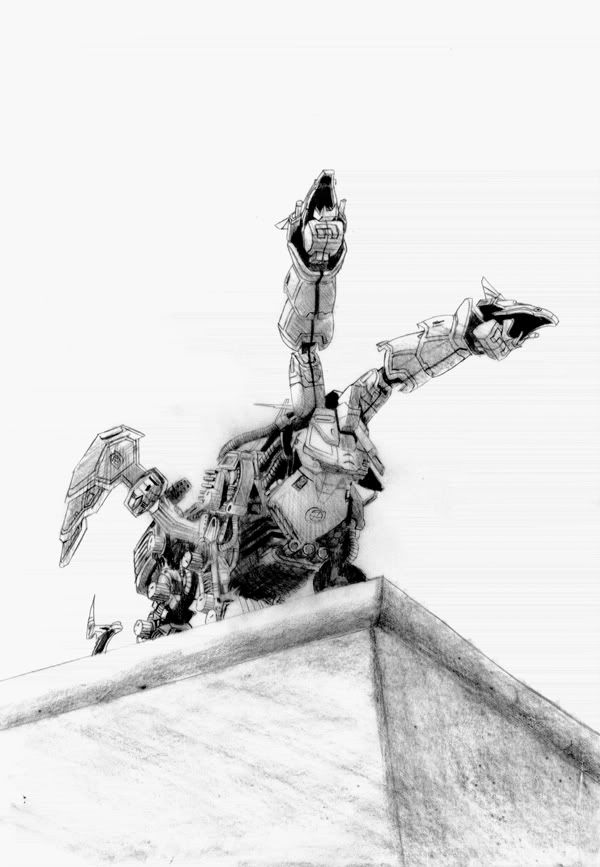
again build into the blocked in picture you may want to use another sheet for this. How smooth out the shapes and add in the details using an HB for fine detail either use a propelling pencil or sharpen a timber one lots., once this is done add in the shadow,to give it a shape the £B is great for this. and you are pretty much done. now renering comes last for the moment i'll talk about pencil renrering. now build up the tone in layers, so start with the lighter areas first, then build up the darkness untill you are happy. now as i was using tracing paper i employed the technique used in the cartoons of rendering on the reverse side of the picture so that the render in osne one side and the detail isnt lost on the other. as in some anime they do the line detail on one side of the asitate and colour in in the other so thet donnot have to redraw the detail. basically to save time and it gives a nice clean look.
as i've said this i'll finish this tonight but for now,meh
JAff- official art critic.
Right first things first
THE TOOLS
obviously you require paper, now depending on what media you wish to use to do the peice determines what type of paper to use. cartidge paper is good for any thing other than paint or ink, and photocopy paper is even worse. in the following examples i have useed 60 g/m2 tranlucent paper (or i laymans terms medium dencity tracing paper- i need this for the couse i'm doing at uni, so i have a 92cmX1200cm roll of it= about £30 a roll) but you can get a good quality cartidge paper about 150g/m2 for around £3 for 30 A4 sheets, going up to £7 for 30 A2 sheets.
Media/ Medium this mean what it is done in i.e. pencil pen, ink, paint etc. I suggest that beginers stick ti pencil it is best to have a variety of pencils, the best would be a 3H, and HB and a 3B, ( if you don't knopw what the grades of pencils mean H= hard, B=black/soft, so an HB is the bog standard graphite used in most pencils, this means the lead is relativly hard ( less sharpening and quite dark do goos tonal depth) the number is the grade the higher the number the more that pencil leans to that side, so a 4H means the thing hardly goes blunt, but it is very light, but to the other extream a 4B is very dark but is also very soft meaning you have to sharpen it more) i would however suggest you get a pack of pencils with a variety of grades you can get these for like £4.50 but thy last a long time. I also use a mechanical pencil or propelling pencil, i use various thicknesses and grades of graphite in these also, these are good because they don't go blunt and have a constant thickness to them which is useful for detailing.
colours, couloured pencils are tricky, a good quality set of them can be any ware upto £200, yes two hundred pounds. but a pretty good set of 20 can be got for a lil under £5, but youi can use those 99p ones but they are pretty poor unless you know what you are doing.
Chalk pastles, oil pastels and paint are probably not the best for the subject i guess you will be using them for, so i'll skip them, but i'll come back to them if you really want. felt-tips are tricky to use but if you are reasonaly skilled you can get a nice effect. the same with ink, now i dont really use ink or paints so you'd best ask some one like GP23 bout that.
oh yeah get a good rubber preferably a putty rubber- it looks and feels like play dough but they are much better than the rubber rubbers, plus because of their consistancy you can shape them so you can get into very small ares, so you gan erase something with out disturbing the rest.
THE PROCESS
befor you start on a proper picture think of what you want to draw and what pose tou want it to be in. if you are making up a zoid look ate its presadents for inspiration. In this tutorial i'm gonna draw a picture of my custom Hydrer wich recently featured in my fake box.
step one- map out pose
THis is essential as with out this frame work things can and do go wrong very quickly. You may want to do this ona seperate sheet and place it under a clean sheet to do the prper picture on. in this care i'm using 3 sheets of tracing paper, to draw on. you could even use the back of the sheet . in this step try to suggest the pose and ground and get the propertions and perspective sorted. you may want to use the 3H for this if oyu are keeping the whole picture on one shhet
step two- block in body thickness
build up a series of shapes ontop of the basic frame making the shape develope into the final shape, in this stage try to suggest to your self were some detail is gonna go. again use the 3H for this
**tip, if say you are going to do a dog type zoid an idea would to get an image of a dog from the net then print it on and trace it onto the sheet or is toy are using t-paper put it under neath- i don't need to in this case as i have the zoid set up infront of me)
step three-add detail and rendering
again build into the blocked in picture you may want to use another sheet for this. How smooth out the shapes and add in the details using an HB for fine detail either use a propelling pencil or sharpen a timber one lots., once this is done add in the shadow,to give it a shape the £B is great for this. and you are pretty much done. now renering comes last for the moment i'll talk about pencil renrering. now build up the tone in layers, so start with the lighter areas first, then build up the darkness untill you are happy. now as i was using tracing paper i employed the technique used in the cartoons of rendering on the reverse side of the picture so that the render in osne one side and the detail isnt lost on the other. as in some anime they do the line detail on one side of the asitate and colour in in the other so thet donnot have to redraw the detail. basically to save time and it gives a nice clean look.
as i've said this i'll finish this tonight but for now,meh
JAff- official art critic.


 )
)